Ever opened a Wikipedia page and wondered how it got to be the way it is? Maybe you saw a fact that felt off, or noticed a sentence that suddenly changed tone. That’s where the diff and history interfaces come in. They’re not fancy tools, but they’re the only way to see exactly what changed, who changed it, and why. If you want to understand Wikipedia beyond the surface, you need to know how to use them.
What the History Tab Shows You
Every Wikipedia page has a history. Click the View history tab at the top of any article. You’ll see a list of every edit made to that page, going back years. Each row is a revision: a timestamp, the username or IP address of the editor, a short summary of the change, and links to view or compare that version.
It’s not just a log. It’s a timeline of collaboration - and conflict. You’ll see edits from registered users with long track records, anonymous editors from universities, bots that fix formatting, and vandals who delete entire sections. The history doesn’t judge. It just records.
Sorting by date is automatic, but you can filter. Use the date range picker to zoom in on a specific week. Check the Hide minor edits box to skip tiny fixes like punctuation. That helps you focus on real content changes. If you’re investigating a controversy, like a disputed biographical claim, narrowing the window to the days around the edit makes it easier to trace the story.
Understanding the Diff Interface
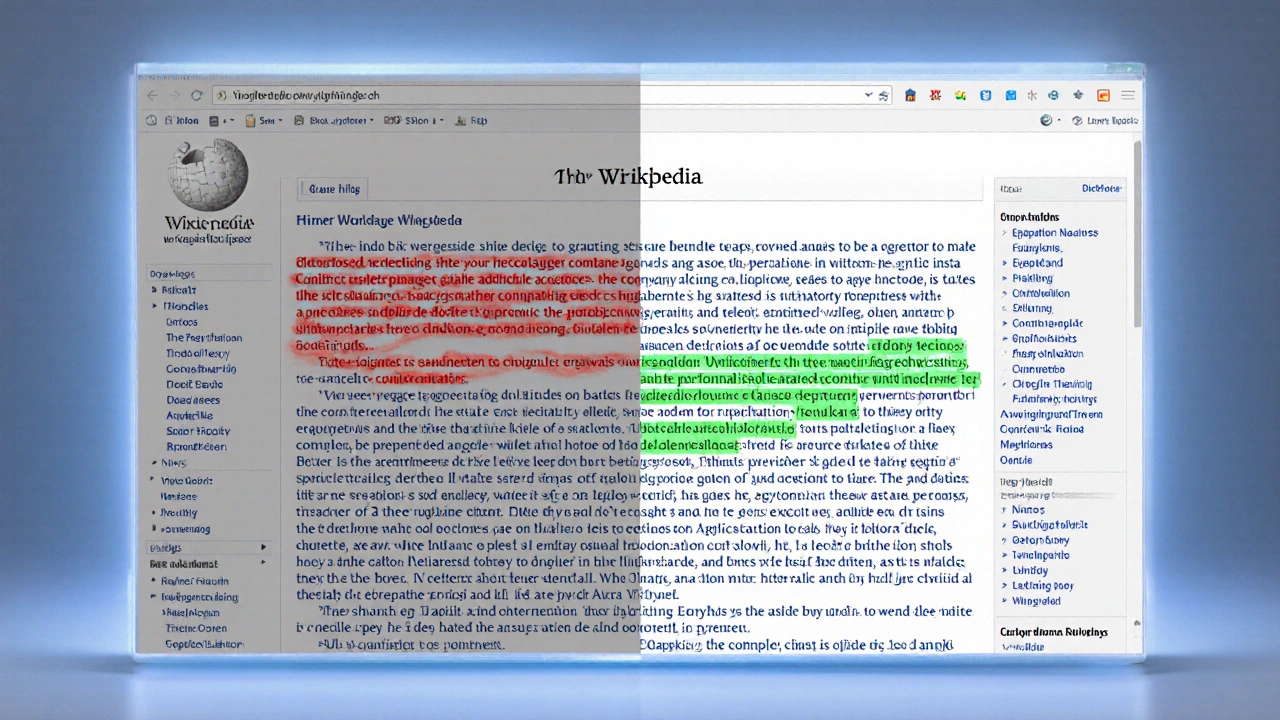
Clicking on any revision’s timestamp opens the diff - short for difference. This is where the real work happens. The diff shows you two versions of the page side by side: the previous version on the left, the new one on the right.
Changes are color-coded. Green highlights text that was added. Red shows text that was removed. Lines that didn’t change are grayed out. It’s simple, but powerful. You don’t need to read the whole page to know what changed. Just scan the colored blocks.
Here’s a real example: In 2023, an edit to the article on the 2023 Canada-NATO summit removed a paragraph about military funding. The diff showed 12 lines deleted in red. The editor’s summary said “clarify source.” When you clicked their user page, you saw they’d made 17 edits in the past month - all to NATO-related pages. That pattern raised a flag. A second editor reviewed the change, restored the text, and added a note on the talk page citing the official NATO press release. Without the diff, that edit would’ve slipped through.
How to Spot Vandalism and Bad Faith Edits
Not every edit is helpful. Some are trolling. Others are biased. The diff makes it easy to catch them.
Look for these red flags:
- Large blocks of text deleted with no summary
- Insertions of URLs to commercial sites or personal blogs
- Changes that push a single political or ideological view without sources
- Repetitive edits from the same IP address, especially from known vandalism hotspots
Wikipedia has automated tools that flag some of this. But bots miss a lot. A 2024 study by the Wikimedia Foundation found that 18% of vandalism went undetected by automated systems for more than 24 hours. Human eyes still matter.
When you spot something suspicious, don’t just revert it. Use the diff to copy the last good version. Then click Undo - not Edit. The undo function automatically creates a new revision with a clear reason: “Reverted edits by [username] to last version by [previous editor].” That leaves a trail. It also prevents edit wars, where two people keep changing the same thing back and forth.
Using the History to Track Source Quality
Wikipedia’s reliability depends on citations. But citations can be added, removed, or replaced - often without explanation.
Use the history to trace how a source evolved. For example, an article on climate change might have once cited a peer-reviewed journal. Then, someone replaced it with a blog post. The diff shows exactly when and how that happened. You can then check the talk page to see if anyone challenged the change. If not, you can restore the original source and leave a note: “Reverted to peer-reviewed source. Blog lacks editorial oversight.”
Some editors remove citations because they don’t like the source. Others remove them because they’re broken links. The diff tells you which. If a link is dead, the edit summary usually says “fix dead link.” If it says “remove biased source,” that’s a red flag.
Advanced Tips: Comparing Multiple Revisions
Want to see how a page changed over three months? You don’t have to click through each edit one by one.
On the history page, check the boxes next to two or more revisions. Then click Compare selected revisions. The diff will show you everything that changed between the first and last version you picked - skipping the middle steps. It’s like fast-forwarding through time.
This is useful for:
- Seeing the full impact of a series of edits during a controversy
- Tracking how a stub article grew into a detailed entry
- Confirming that a problematic edit was fully reversed
Pro tip: Always compare the version before the edit with the version after. Never compare two edited versions unless you’re sure the first one was clean. Otherwise, you might miss the original problem.

What the History Doesn’t Tell You
Wikipedia’s history is transparent - but incomplete. It shows what changed, but not why. That’s where the talk page comes in.
Every article has a Talk tab. That’s where editors discuss changes before or after they’re made. A major edit often comes with a note like “Added this after discussion on talk page.” Click the link. You might find a 30-comment thread where editors debated the wording, cited sources, and reached consensus.
Without the talk page, the history is just a list of changes. With it, you get context. You see the reasoning. You understand the community.
Some edits happen in silence. That’s when you should step in. If you see a controversial change with no discussion, add a note on the talk page: “Can we discuss this edit? I’m concerned about the source.” That’s how Wikipedia improves - not by one person fixing everything, but by many people asking questions.
Why This Matters Beyond Wikipedia
Learning to read diffs and histories isn’t just for Wikipedia fans. It’s a skill for anyone who uses online information.
News sites, corporate wikis, government databases - they all use similar systems. If you can spot a bad edit on Wikipedia, you can spot a misleading update on a corporate policy page. You can question why a statistic disappeared from a public report. You can trace how a claim evolved from a tweet to a headline.
Wikipedia’s tools are public, free, and built for transparency. Most platforms aren’t. But the mindset is the same: don’t trust the final version. Ask how it got there.
How do I find the diff on a Wikipedia page?
Go to the article, click the "View history" tab at the top. Find the edit you want to review and click the "cur" or "prev" link next to it. That opens the diff view, showing changes between that revision and the one before it.
Can I see who made a specific edit?
Yes. Every entry in the history shows the username or IP address of the editor. Click their name to see their user page, edit count, and any warnings or blocks. Anonymous editors appear as an IP address, like 198.51.100.42.
What does "minor edit" mean?
A minor edit is a small change like fixing a typo, correcting spacing, or updating a date. Editors mark these to avoid cluttering the history. You can hide them using the "Hide minor edits" filter on the history page.
How do I undo a bad edit?
On the history page, click the "undo" link next to the edit you want to reverse. This creates a new revision that reverts the change and automatically adds a summary like "Reverted edit by [username]." Avoid using the "edit" button to manually delete changes - it doesn’t leave a clear trail.
Why do some edits have no edit summary?
Edit summaries are optional, but encouraged. Many experienced editors skip them for small changes. But if you see a major edit with no summary - especially one that removes content - it’s worth checking the talk page or reverting it until someone explains why.